This tutorial provides step-by-step instructions on installing nodes on a Pterodactyl and configuring it. The process includes downloading the Wings file, setting up the directory structure.
¶ Prerequisites
Before you begin, ensure that you have the following:
- Access to the server where you want install a second node.
- sudo or root access to the server.
- Basic knowledge of working with the command line.
¶ Requisites
- Actually the wings support only servers with KVM or with the compatibility with Docker.
- Some Hosting provider can provide LXC container with proxmox, make sure docker is runnable.
- You can you this script here for automate the installation, it currently support only x86 architecture.
¶ Supported Systems
Below is a list of operating systems that are officially supported. It's important to note that this is not an exhaustive list, and there's a strong likelihood that the software can be run on other Linux distributions with minimal effort. Users are accountable for identifying the necessary packages on those systems. Additionally, it's highly probable that new releases of the supported operating systems mentioned below will be compatible, and users are not limited to the specific versions listed.
| Operating System | Version | Supported | Notes |
|---|---|---|---|
| Ubuntu | Documentation is written with the assumption that Ubuntu 18.04 serves as the underlying operating system. | ||
| Centos | |||
| Please be aware that CentOS 8 has reached its end-of-life (EOL). Consider using Rocky Linux or Alma Linux as alternatives. | |||
| Debian | |||
| Windows | This software is not compatible with Windows environments. |
¶ Installing Docker
For a quick installation of Docker CE, you can execute the following command:
curl -sSL https://get.docker.com/ | CHANNEL=stable bash
¶ Start Docker on Boot
If your operating system uses systemd (such as Ubuntu 16+, Debian 8+, CentOS 7+), run the following command to ensure Docker starts automatically when you boot your machine:
sudo systemctl enable --now docker
¶ Installing Wings
OVH/SYS Servers
If you are utilizing a server provided by OVH or SoYouStart, please note that the main drive space is typically allocated to
/homeand not/by default. It is advisable to use/home/daemon-datafor server data. This configuration can be easily set during the node creation process.Source: Pterodactyl Documentation
To install Wings, the first step is to ensure the required directory structure is set up. Run the following commands to create the base directory and download the Wings executable:
sudo mkdir -p /etc/pterodactyl
curl -L -o /usr/local/bin/wings "https://github.com/pterodactyl/wings/releases/latest/download/wings_linux_$([[ "$(uname -m)" == "x86_64" ]] && echo "amd64" || echo "arm64")"
sudo chmod u+x /usr/local/bin/wings
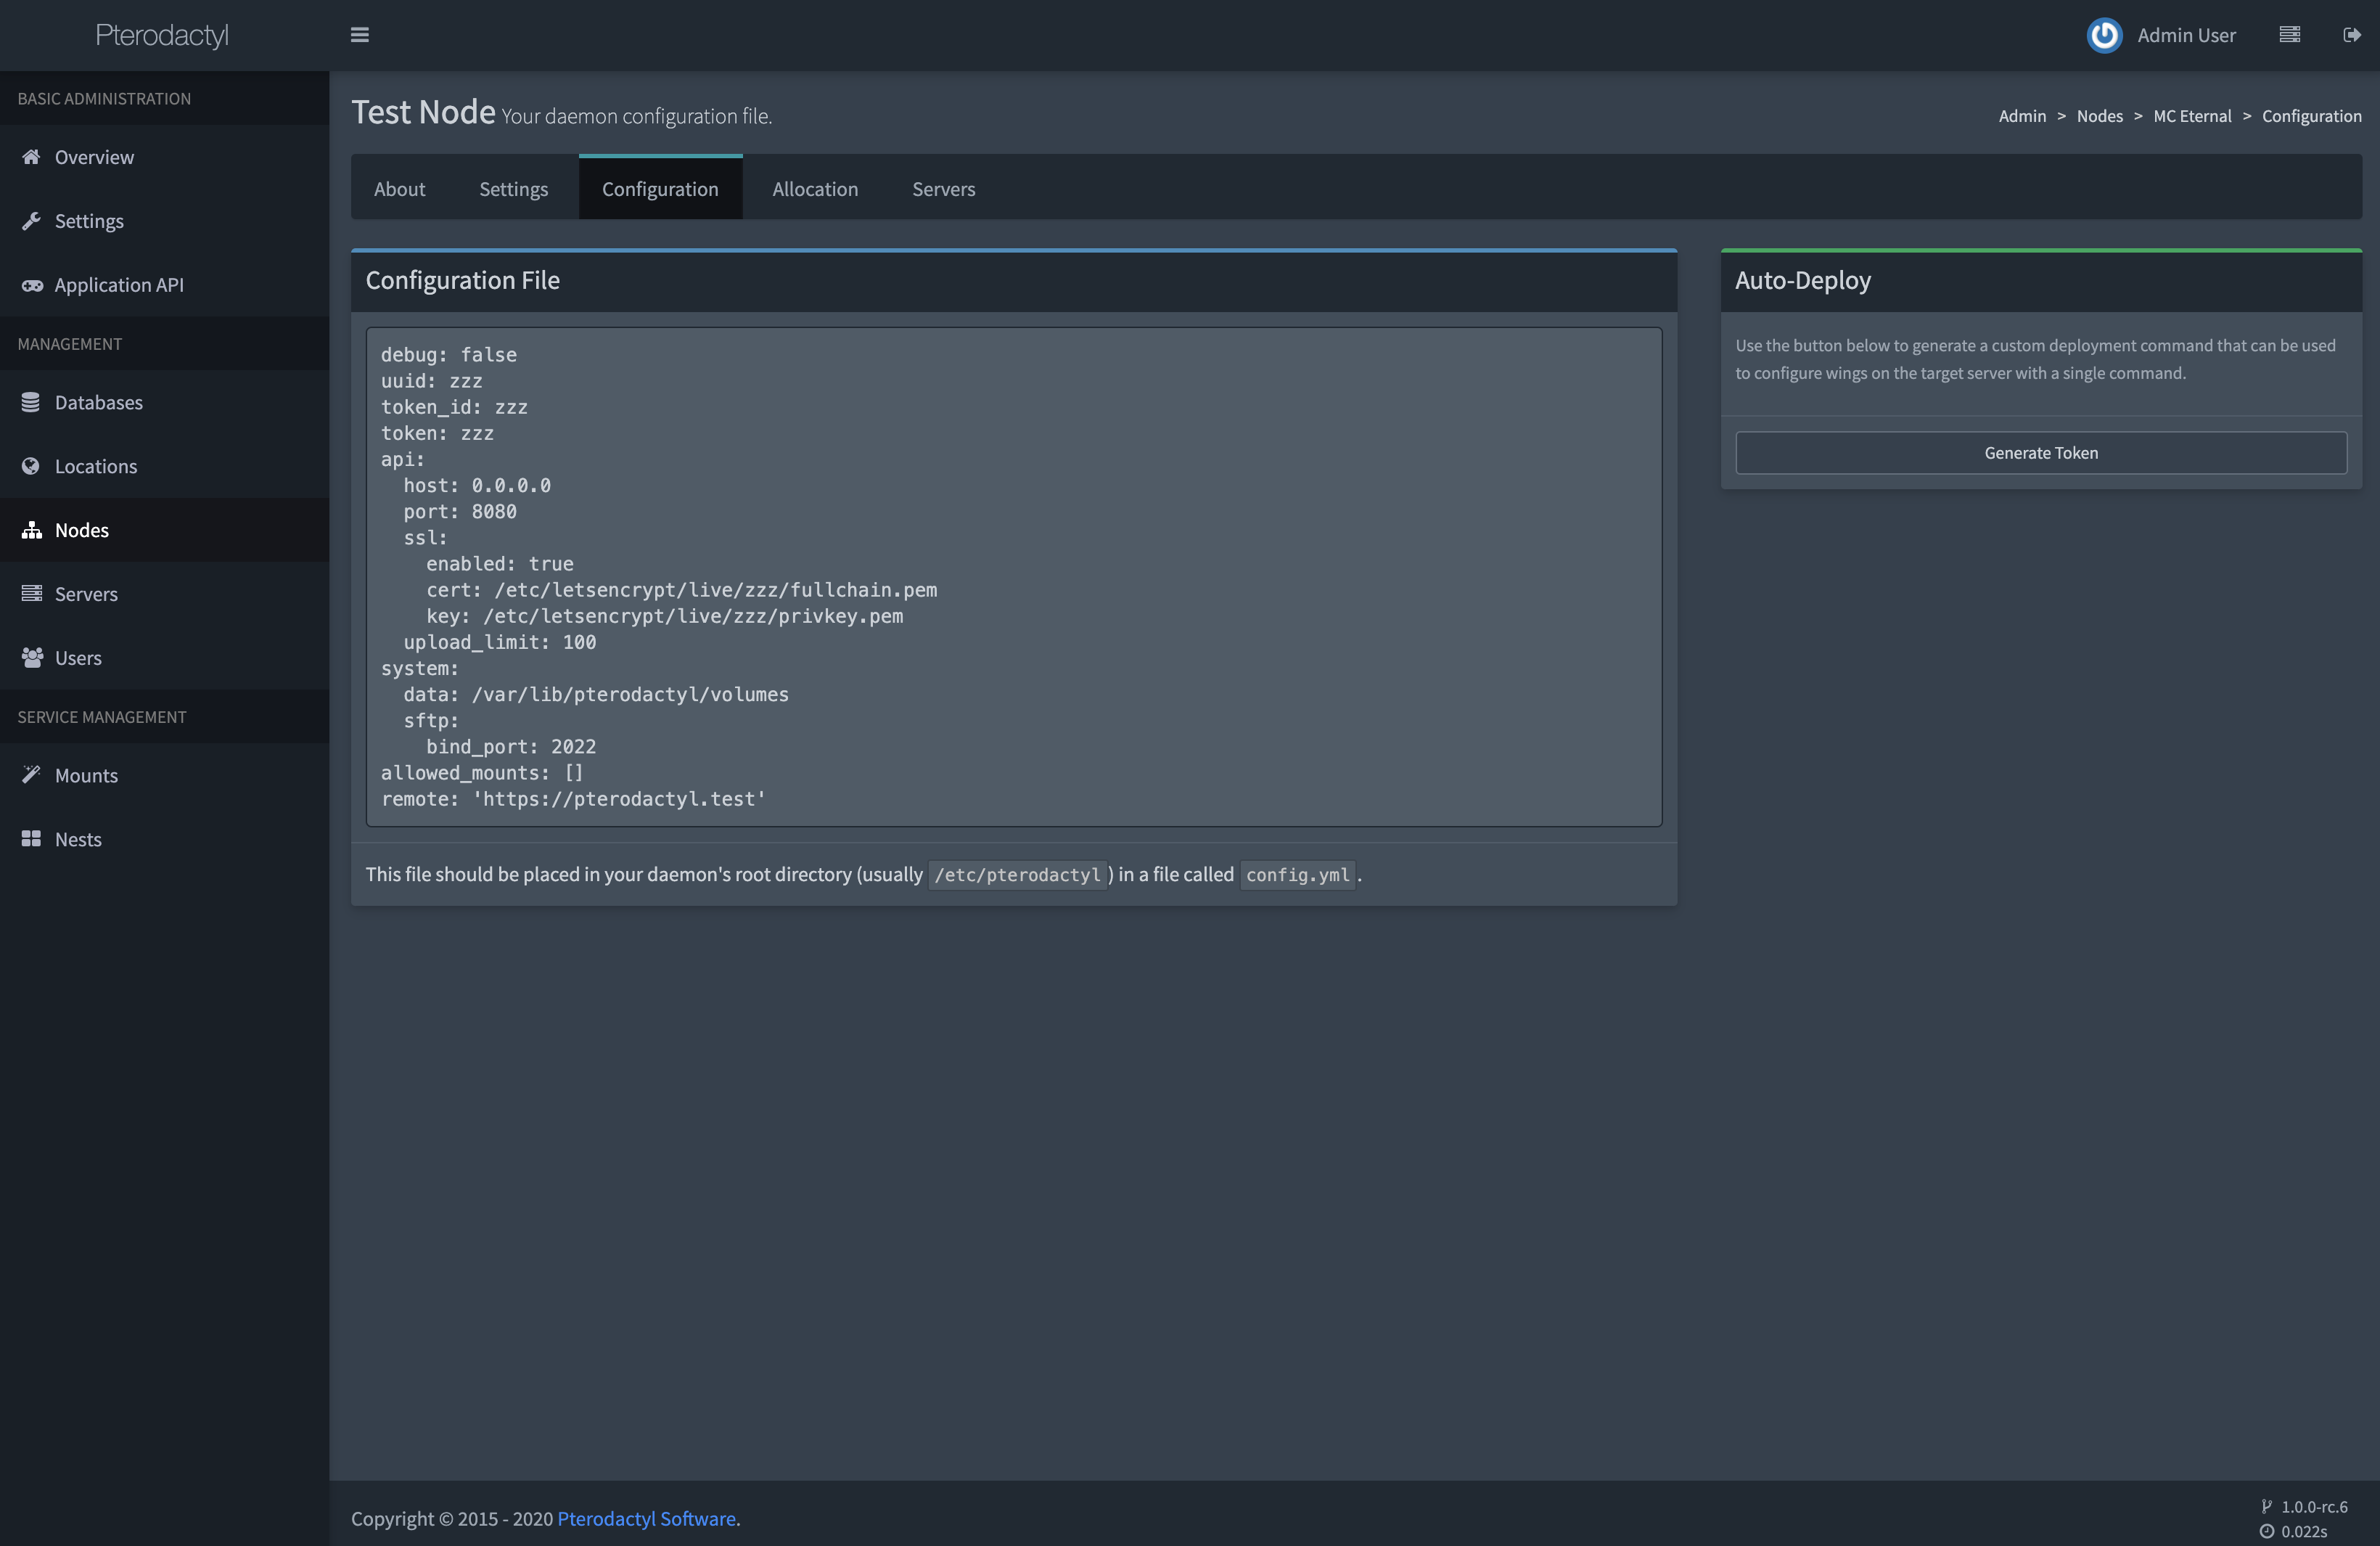
¶ Configure Wings on Pterodactyl
Source: Pterodactyl Documentation
After installing Wings and the necessary components, proceed to create a node within your installed Panel. Access your Panel's administrative view, navigate to Nodes in the sidebar, and click the "Create New" button on the right side.
Once the node is created, select it and access the "Configuration" tab. Copy the content within the code block, paste it into a new file named config.yml in /etc/pterodactyl, and save it.
Alternatively, you can utilize the "Generate Token" button, copy the bash command provided, and paste it into your terminal.
¶ Daemonizing (using systemd)
To run Wings in the background using systemd, follow these steps. Ensure that Wings runs without errors before proceeding. Create a file named wings.service in the /etc/systemd/system directory.
To avoid any troubles, I have created a command to be executed that handles everything automatically:
echo -e "[Unit]\nDescription=Pterodactyl Wings Daemon\nAfter=docker.service\nRequires=docker.service\nPartOf=docker.service\n\n[Service]\nUser=root\nWorkingDirectory=/etc/pterodactyl\nLimitNOFILE=4096\nPIDFile=/var/run/wings/daemon.pid\nExecStart=/usr/local/bin/wings\nRestart=on-failure\nStartLimitInterval=180\nStartLimitBurst=30\nRestartSec=5s\n\n[Install]\nWantedBy=multi-user.target" | sudo tee /etc/systemd/system/wings.service && sudo systemctl daemon-reload && sudo systemctl enable --now wings
¶ Node Allocations
Allocation is a combination of IP and Port that you can assign to a server. Each created server must have at least one allocation. The allocation would be the IP address of your network interface. In some cases, such as when behind NAT, it would be the internal IP. To create new allocations, go to Nodes > your node > Allocation.
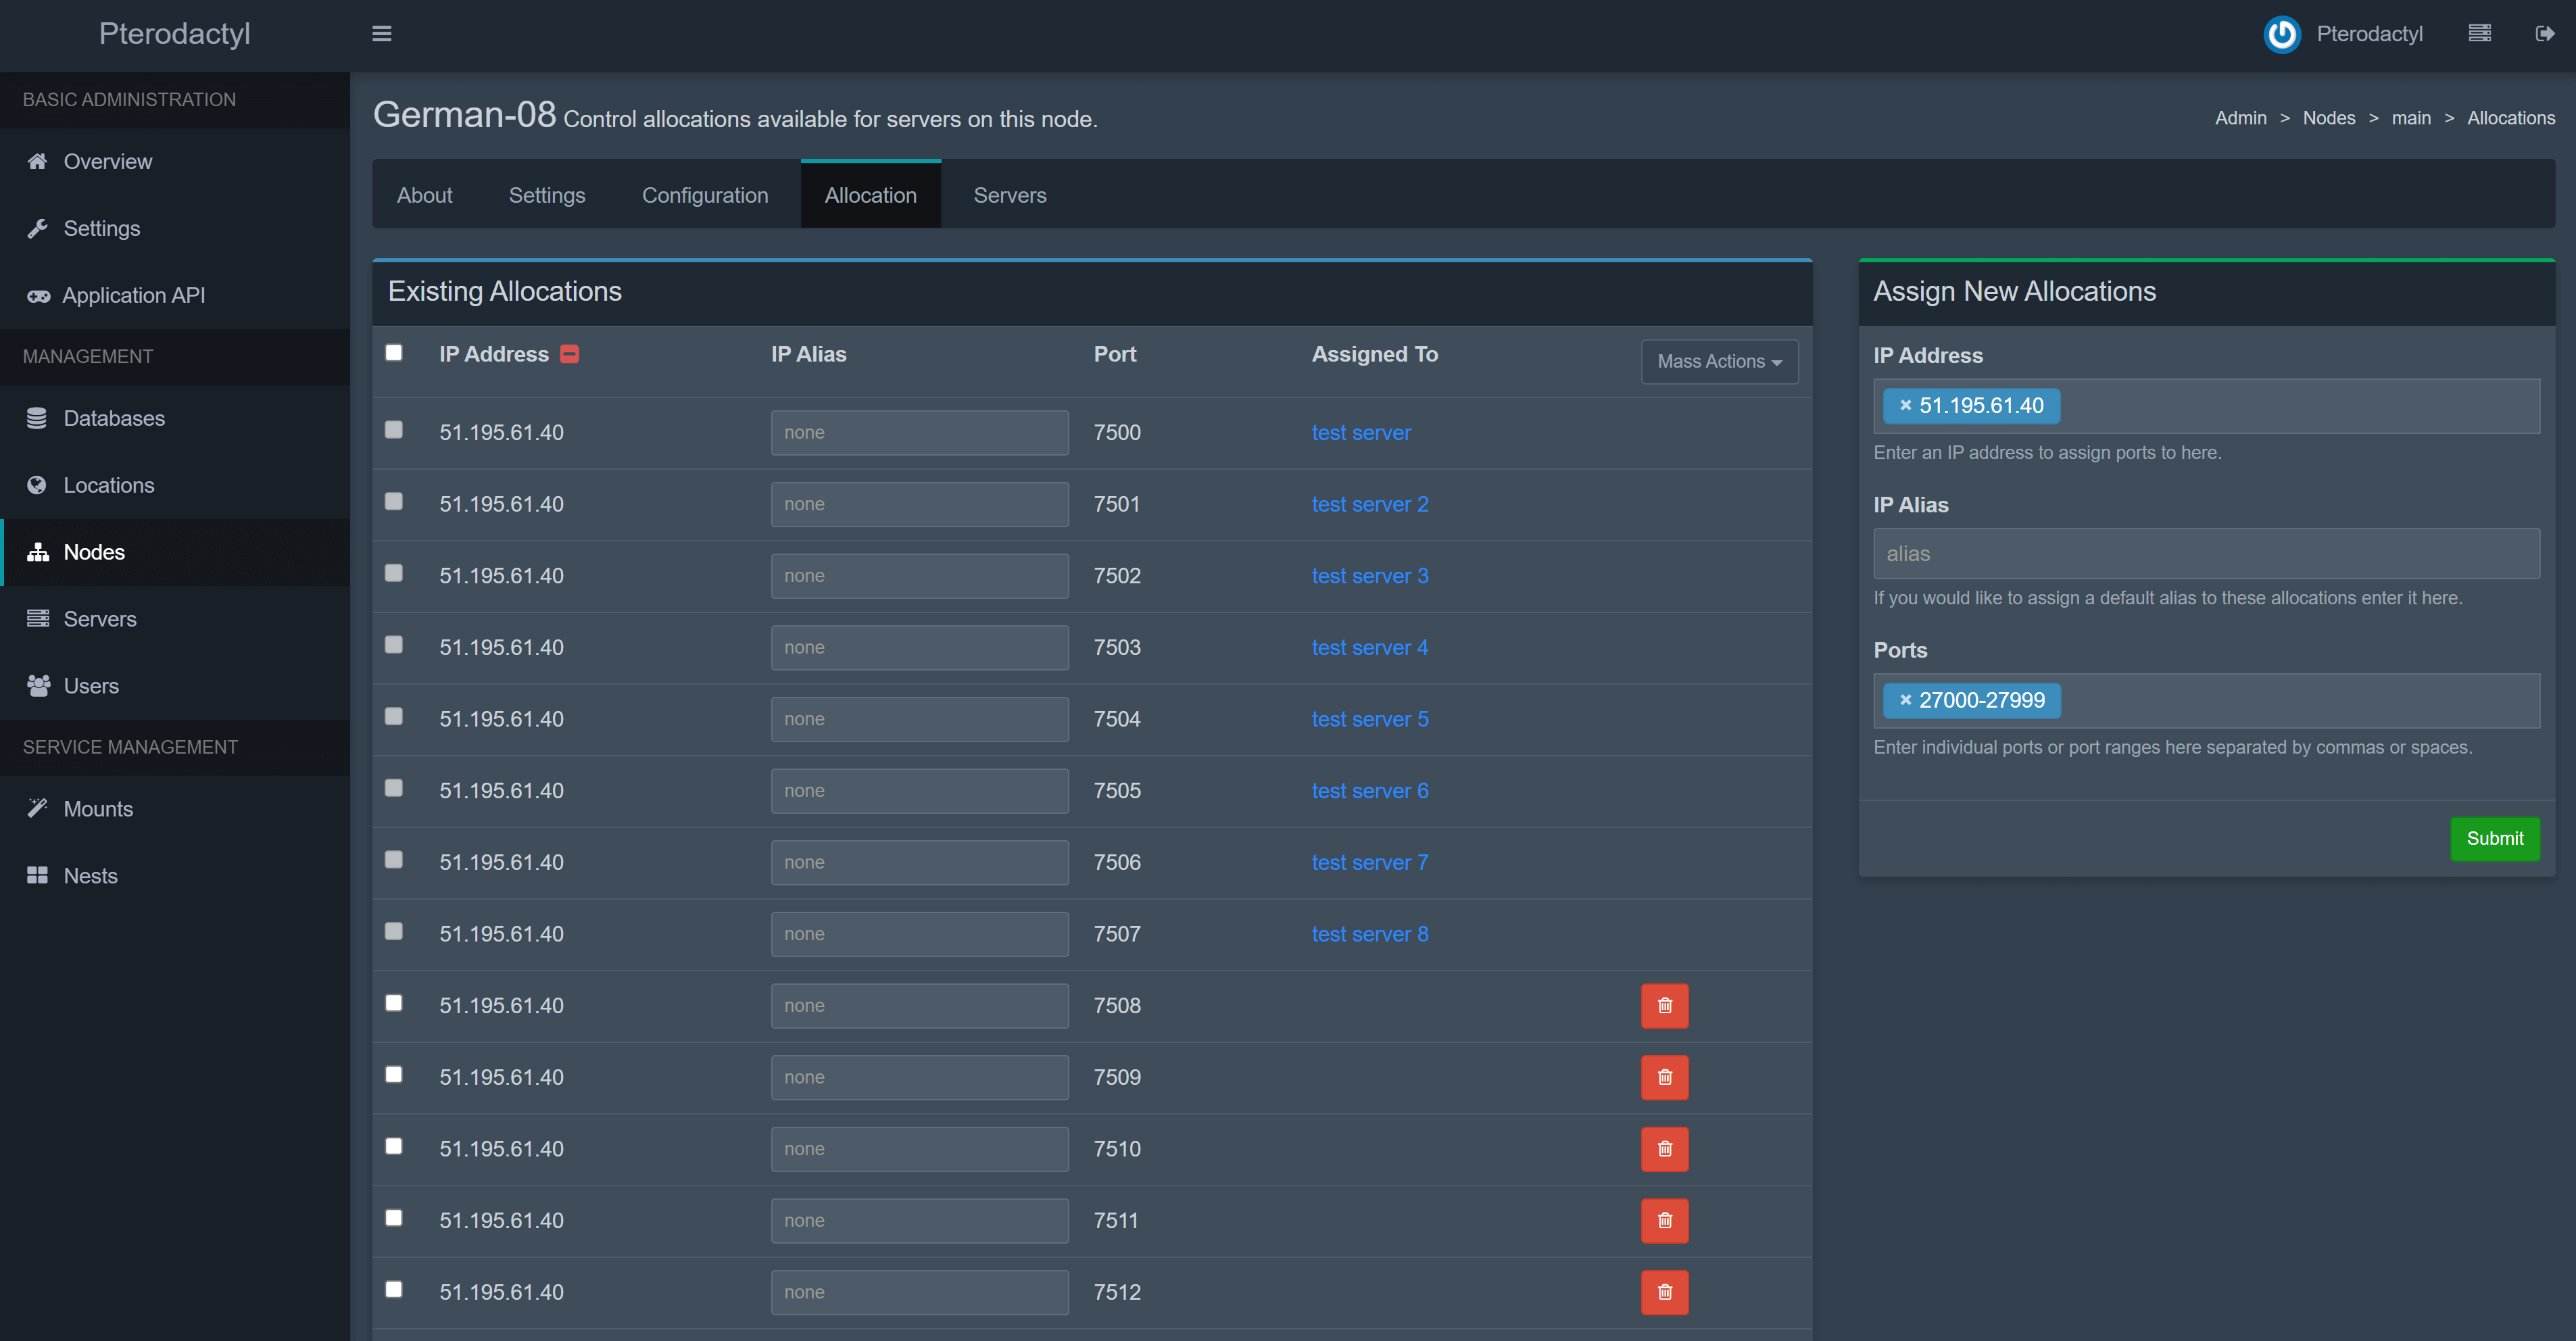
Type hostname -I | awk '{print $1}' to find the IP to be used for the allocation. Alternatively, you can type ip addr | grep "inet " to see all your available interfaces and IP addresses. Do not use 127.0.0.1 for allocations.
¶ 🎥 Video reference